Setting Up User Access
Access permissions can be set up for users using the ADM or Pharmacy Manager user. Other users with full access to the Security window can also do this. By default, each role type is assigned a set of access permissions, but these can be customized for each user. When access is customized, a *Customized* indicator appears when the user is selected in the Security window. Customized access can be reverted to the defaults for the user's role type by selecting the Default Access checkbox.
You can use the Copy function to assign the same set of permissions for an existing user to a new user.
There are three types of access:
-
Full Access - users can view, modify, and edit the specified folder/window.
-
Read Only Access- users cannot modify or edit but can view the specified folder/window. In some instances, the user can modify their own settings (i.e. password, Narcotic Code). This option is not available for reports.
-
No Access - users cannot view, modify, or edit the specified folder/window.
User access for specific role types can be seen in the Role Types tab of the Security Administration Facility window.
To set up General and Report Access:
-
Open the Security window using the ADM or Pharmacy Manager user.
-
Select the user at the top that you want to modify access for.
-
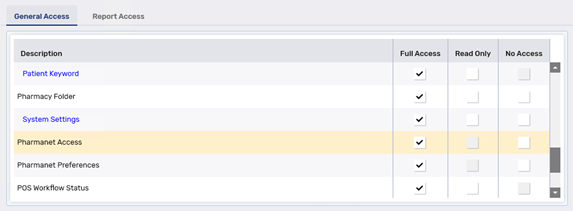
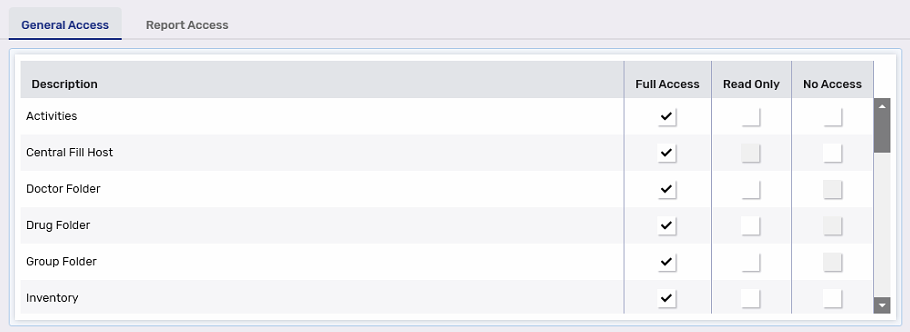
From the General Access tab at the bottom, select the appropriate checkboxes for the folders/windows you want to customize access for. This includes the following PharmaNet permissions:
-
Patient Keyword - for adding or editing patient keywords in the Patient Folder Programs tab.
-
Pharmanet Access - for submitting PharmaNet transactions.
-
Pharmanet Preferences - for editing settings in More > British Columbia.
You cannot assign a child row more access than the parent row. Propel Rx will automatically update the parent row with the corresponding access and grey out the options beneath it.
-
-
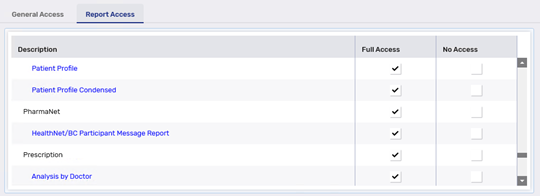
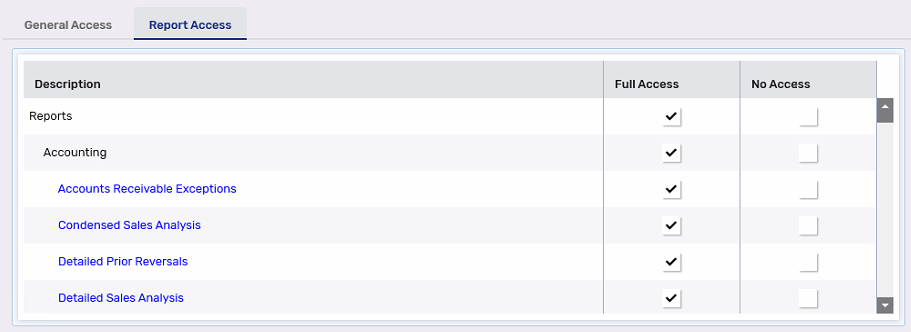
From the Report Access tab, select the appropriate checkboxes for the reports you want the user to access. For more information, see Setting Up Report Access.
-
Select Save.
To set up General and Report Access:
-
Open the Security window using the ADM or Pharmacy Manager user.
-
Select the user at the top that you want to modify access for.
-
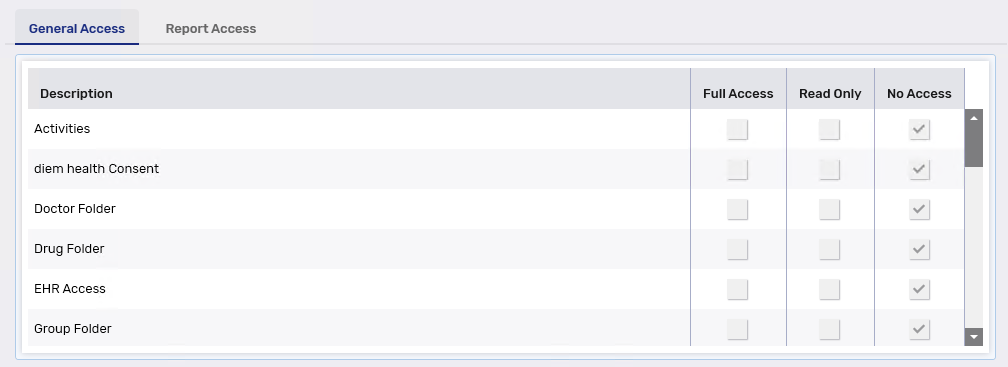
From the General Access tab at the bottom, select the appropriate checkboxes for the folders/windows you want to customize access for. This includes the permission for submitting transactions to the EHR (EHR Access).
You cannot assign a child row more access than the parent row. Propel Rx will automatically update the parent row with the corresponding access and grey out the options beneath it.
-
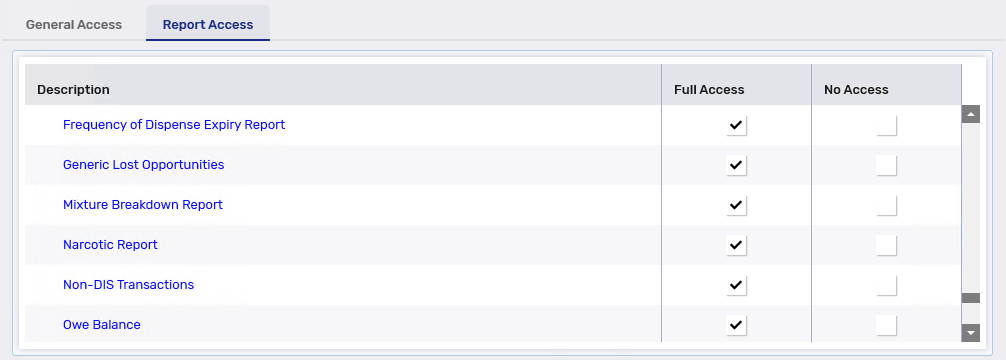
From the Report Access tab, select the appropriate checkboxes for the reports you want the user to access. For more information, see Setting Up Report Access.
-
Select Save.
To set up General and Report Access:
-
Open the Security window using the ADM or Pharmacy Manager user.
-
Select the user at the top that you want to modify access for.
-
From the General Access tab at the bottom, select the appropriate checkboxes for the folders/windows you want to customize access for.
You cannot assign a child row more access than the parent row. Propel Rx will automatically update the parent row with the corresponding access and grey out the options beneath it.
-
From the Report Access tab, select the appropriate checkboxes for the reports you want the user to access. For more information, see Setting Up Report Access.
-
Select Save.
General and Report Access
To set up General and Report Access:
-
Open the Security window using the ADM or Pharmacy Manager user.
-
Select the user at the top that you want to modify access for.
-
From the General Access tab at the bottom, select the appropriate checkboxes for the folders/windows you want to customize access for.
You cannot assign a child row more access than the parent row. Propel Rx will automatically update the parent row with the corresponding access and grey out the options beneath it.
-
From the Report Access tab, select the appropriate checkboxes for the reports you want the user to access. For more information, see Setting Up Report Access.
EHR Access
All Propel Rx users must be registered and have a NLPN account in order to use the Pharmacy Network services. If a user does not have a NLPN account, you must contact the Newfoundland and Labrador Health Services Help Desk. In order to set up a user with EHR access in Propel Rx, the user has to log in and enter their EHR password. Once the username and EHR password are entered, the user will have EHR access. For new users or users with no EHR access, it will be necessary to enter your EHR password in order to get EHR access.
To set up EHR access for your user account:
-
Log into Propel Rx using your username and password. The EHR User Login window opens.
-
Bypass the EHR User Login window by selecting Cancel or X in the top right corner.
-
Select More (...) > Security. The Security Login window opens.
-
Enter your Propel Rx password in the Security Login window. The Security Administration Facility window opens.
-
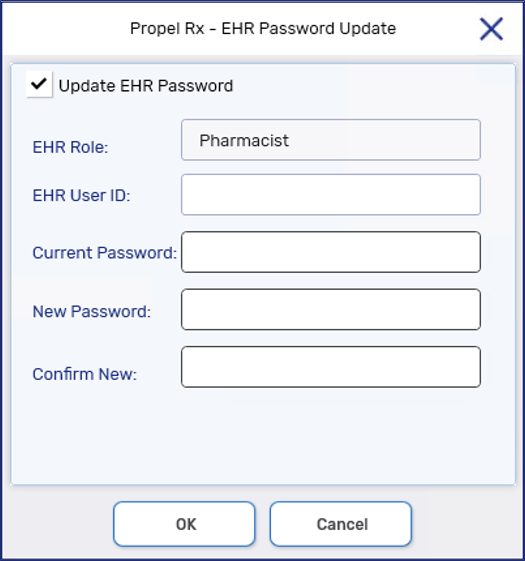
Select EHR Password. The EHR Password Update window opens.
-
Select the Update EHR Password checkbox to enable the password fields.
-
Enter your EHR user ID in the EHR User ID field.
-
Enter your EHR password in the Current Password field.
-
Enter a desired updated password in the New Password and Confirm New fields.
-
Select OK.
Once you have correctly entered your EHR user ID and password, the EHR Access checkbox in the Users tab will be selected, indicating you now have EHR access. The *Customized* indicator will also appear below the Default Access checkbox.